[Concept 6] Create and Configure Filter Group
Scenario
You want to create a filter group and link it to a property to ensure that only those values that pass the filtering criteria are logged into HDB.
Create a Filter Group
- System Manager is in Engineering mode.
- System Browser is in Management View.
- You have created an HDB and you do not want all the COVs of a property to be logged into HDB.
- Select Project > Management System >Servers > Main Server > History Database > Filter Groups.
- Click New
 .
.
- In the Filter Configuration expander, enter values into the following fields:
- Name
- Description
- Valid
- Deadband type: Percentage or Absolute
- Deadband value
- Click Save
 .
.
- The filter group configuration is saved and a new filter group is created.

Assign Data Points to the Filter Group
After creating a filter group, you must link the filter group to a property in the Object Configurator tab to enable the logging of COVs according to the filter group configured.
- Perform either of the following:
- Select Project > Field Networks > [network] > Hardware > [device] > [data point]. The folder path may vary by view or subsystem.
- Select multiple objects for bulk engineering (see Bulk Engineering Objects).
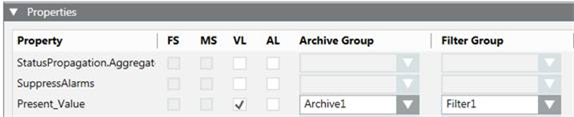
- Click the Object Configurator tab.
- In the Properties expander, select the desired property, for example, Present Value.
- Select the VL (data values, see Log Data Values in Logging Data Values or Events) check box or/and the AL (events, see Log Events in Logging Data Values or Events) check box.
- Select the Archive group column.
- In the drop-down list, select the desired archive group.
- Click Save .
- Repeat steps 1 to 7 for all needed data points.